Installation
Initial Setup 🔗
Step 1: Download the LuckPerms jar file 🔗
The first thing you will need to do is download LuckPerms. You can always find the latest versions of LuckPerms for all of the platforms we support on our downloads page.
Just click the link to download and save the file somewhere easily accessible.
- If you are running a non-modded server for Minecraft: Java Edition, we recommend that you use Paper as your server.
- If you are running a modded server for Minecraft: Java Edition, we recommend that you use Fabric or NeoForge as your server.
- If you are running a server for Minecraft: Bedrock Edition, we recommend that you use Nukkit as your server.
- If you are running a proxy to connect multiple Minecraft servers together, we recommend that you use Velocity or Waterfall (BungeeCord) as your proxy.
If you haven't got anywhere to host your server yet, check out our partner BisectHosting, who offer LuckPerms users 25% off all of their Minecraft server hosting plans.
Step 2: Add the LuckPerms jar to your server's plugins or mods folder 🔗
Next, we need to install LuckPerms onto the server. Make sure you have selected & installed the correct server jar, and that your server has successfully started at least once (this is to ensure the necessary folders will have been generated).
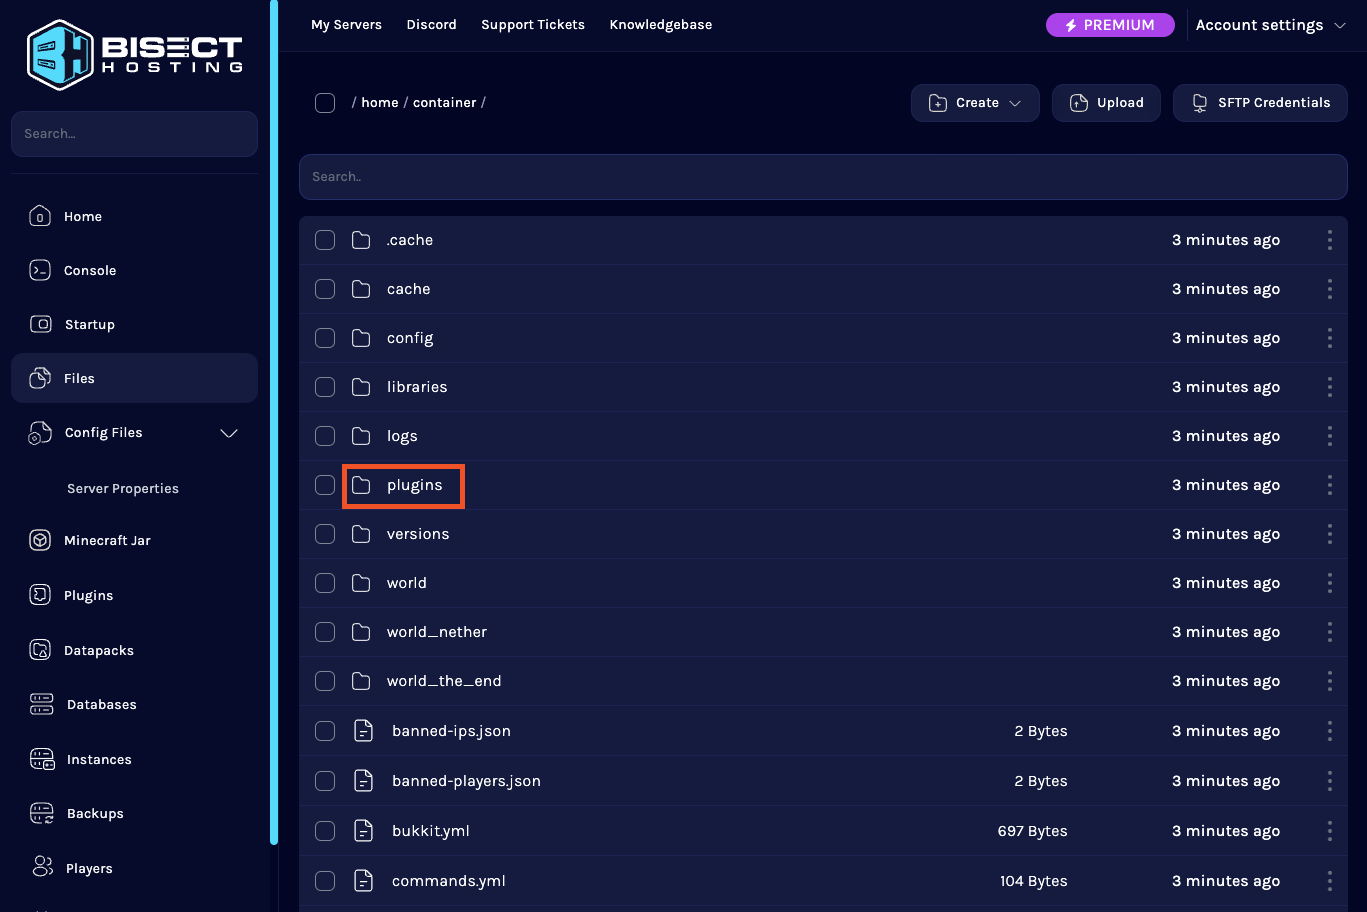
Navigate to your hosting panel's "File Manager", and open the plugins folder (for Bukkit, Nukkit, etc) or mods folder (for Sponge or Fabric).
Note in step 1 that while Sponge can use 'plugins', these are not the same as Bukkit plugins. The Sponge version of LuckPerms and the Bukkit version are different JARs because they are not cross-compatible. Ensure you install the correct version!
Once you're in the plugins or mods folder, click upload and when prompted, select the LuckPerms jar you downloaded in Step 1. Then click "Upload".
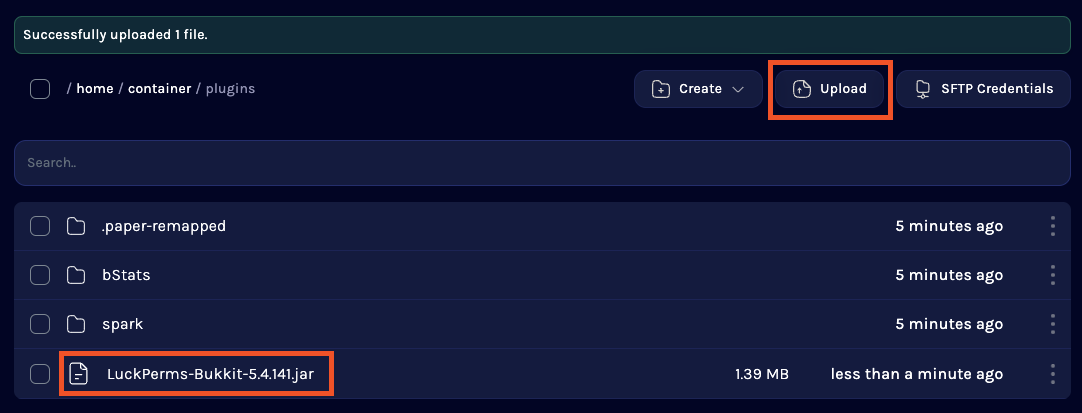
If you've installed an older version of LuckPerms before, make sure to delete any existing jar files.
Step 3: Fully restart your server 🔗
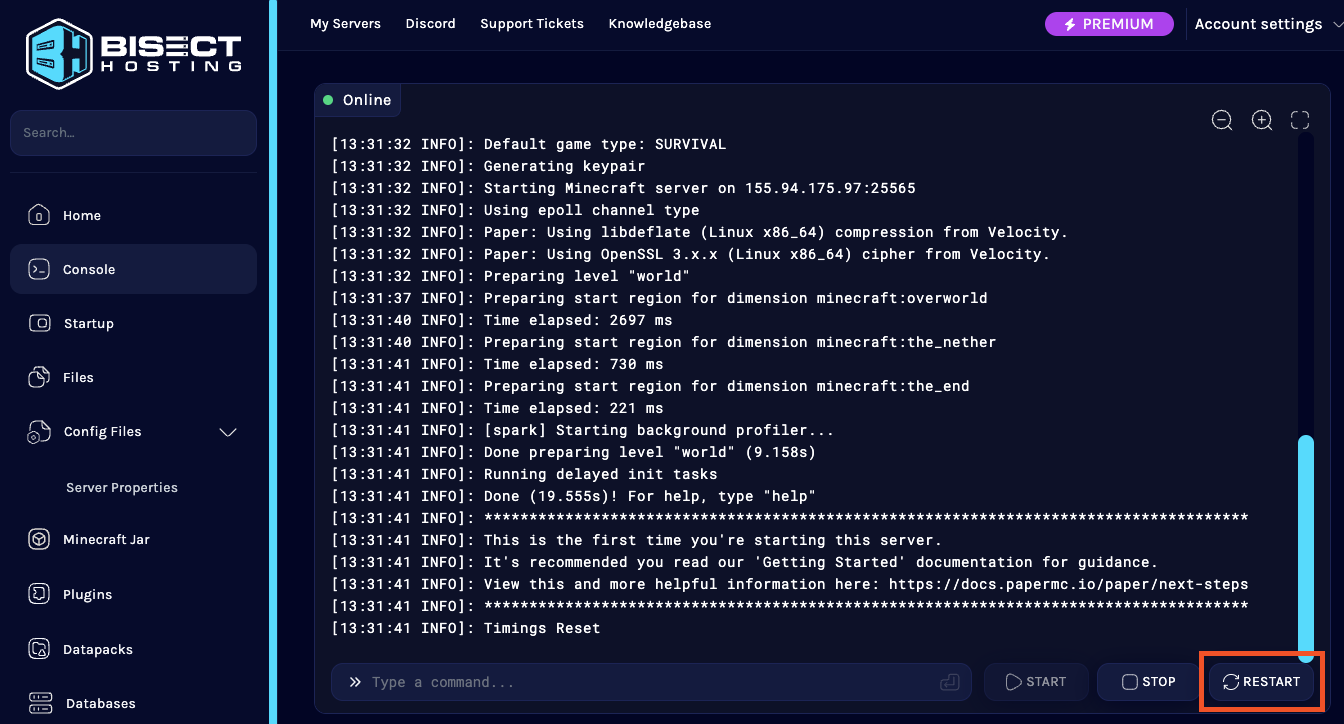
Go to your server console and click "restart" or type stop.
When your server starts back up, LuckPerms will enable and generate the default configuration file. You should monitor the console to make sure LuckPerms starts up and enables correctly.
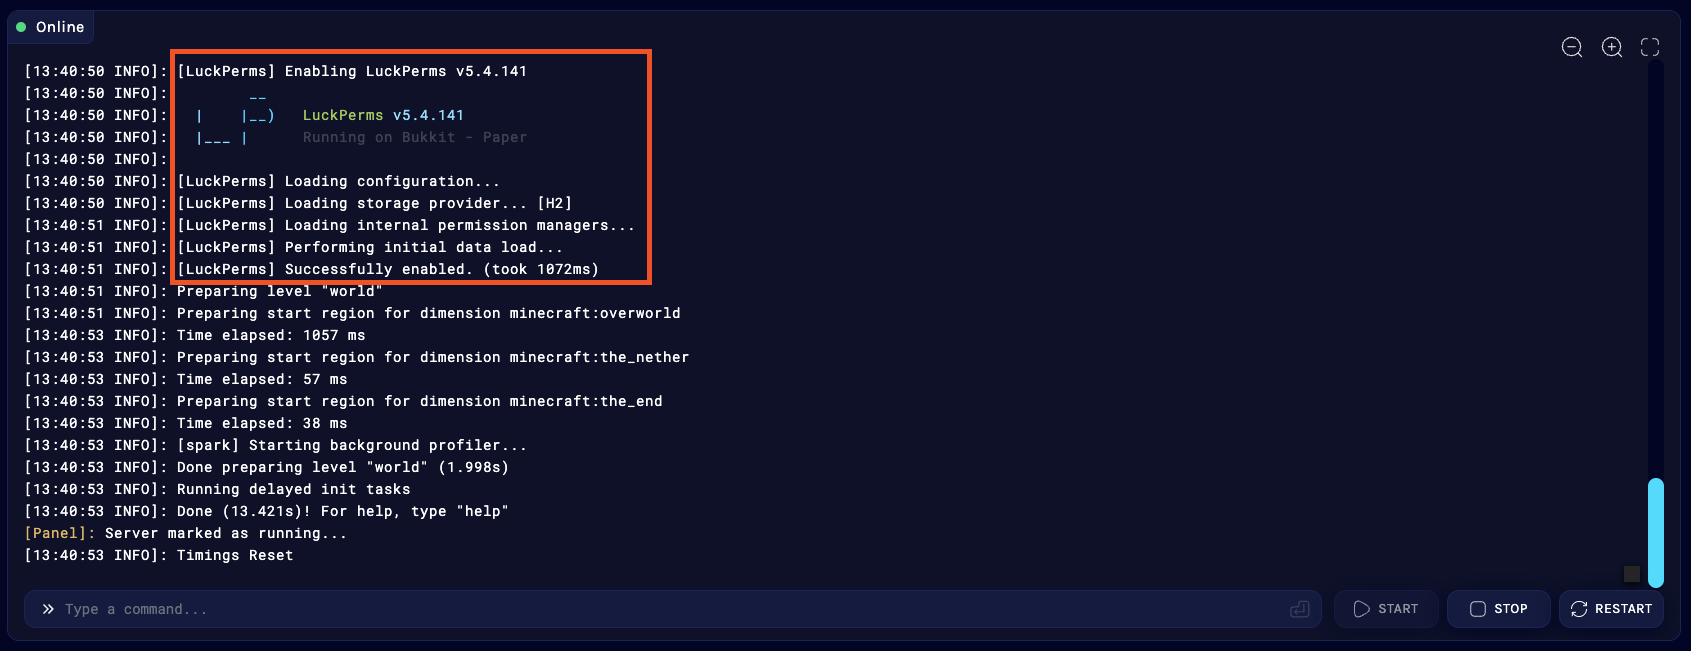
LuckPerms is now installed and you can start using it right away! Move onto the Usage section of the wiki for more information about what to do next!
Step 4: Configuring LuckPerms 🔗
To customize LuckPerms, you can make changes to its configuration file.
Go back to the "File Manager", then open the plugins folder (for Bukkit, Nukkit, etc) or config folder (for Sponge, Fabric or Forge). Then, open the LuckPerms folder within.

Here you will find a number of files. The important ones are:
config.yml- this is the LuckPerms configuration file for Bukkit, Spigot, Nukkit, etc. serversluckperms.conf- this is the LuckPerms configuration file for Sponge and Fabric serversluckperms-h2-v2.mv.db- this is the database file LuckPerms uses to store your permissions data (don't delete it!)
You can click on the config.yml or luckperms.conf files to view/edit them.
Step 5 (optional): Setup LuckPerms to use a MySQL database or .yml files to store data 🔗
By default, LuckPerms stores all of it's data in a file-based database file called "H2". This is great because it's efficient and lets people start using LuckPerms without any extra config steps.
However, if you would prefer for LuckPerms data to be stored in readable, editable .yml files: open config.yml/luckperms.conf, scroll down to the "Storage Settings" section and set storage-method to yaml. Then restart your server.
If you run multiple servers in a network (or plan to do so in the future), then you will need to setup a remote database like MySQL for LuckPerms to store its data in.
Most server hosts provide these for free! Find the "Databases" menu, then click "Create database". If prompted, choose "MySQL" as the database type and input a sensible name.
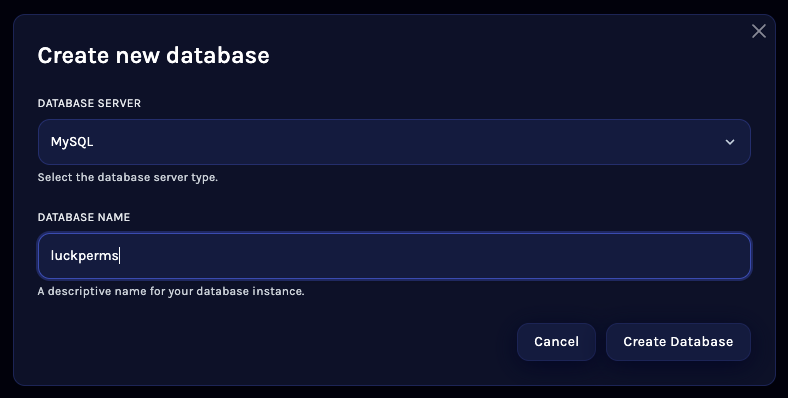
After your database has been created, you should be presented with the following: a hostname, database name, username and password.
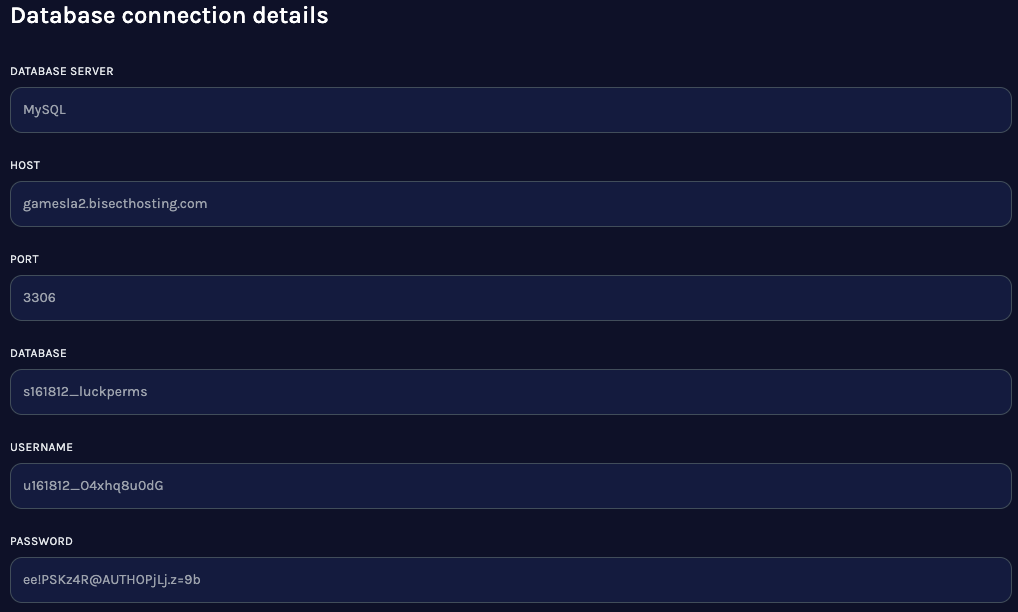
Once you have these details, take a note of them (or duplicate your tab), then navigate back to the LuckPerms config.yml/luckperms.conf file in the file manager and open it.
Scroll down to "Storage Settings" secton and set storage-method to mysql. Then fill out your database info under the data: section.
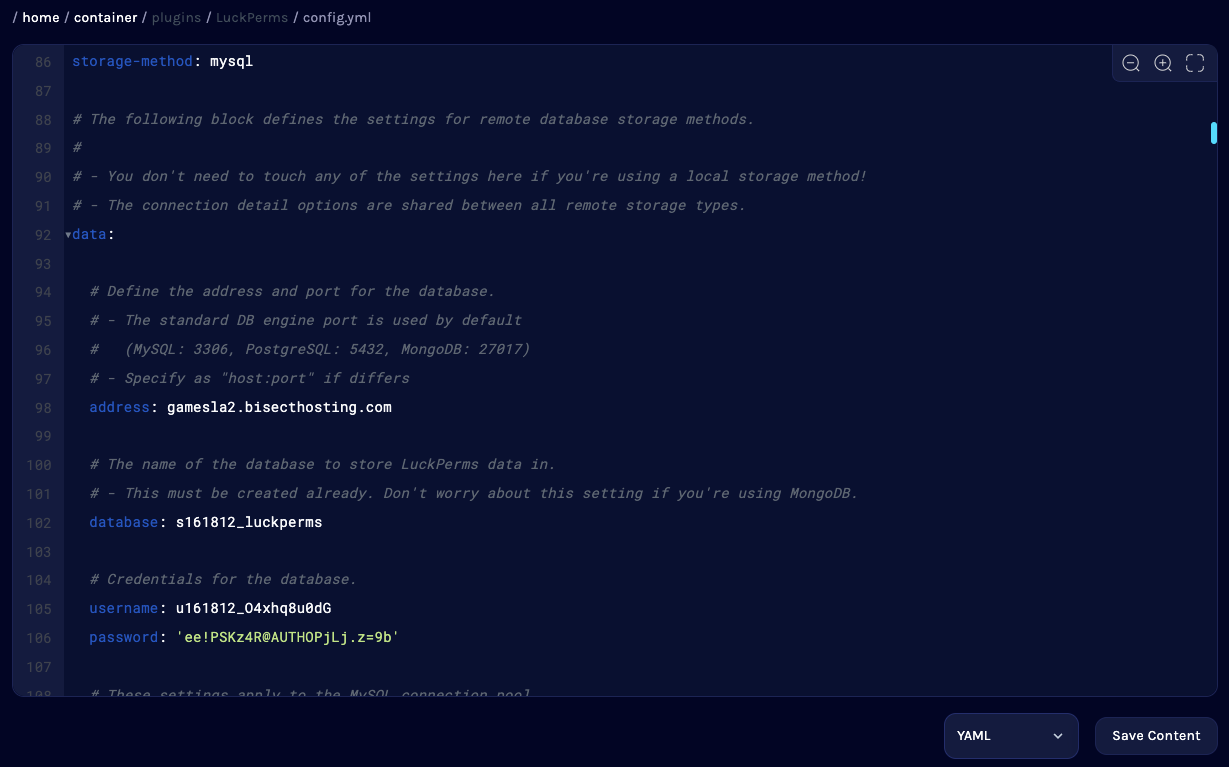
Click save, then restart your server.
You can then confirm in the console that MySQL has been setup correctly. If you see Loading storage provider... [MYSQL] followed by no errors, everything is working correctly!
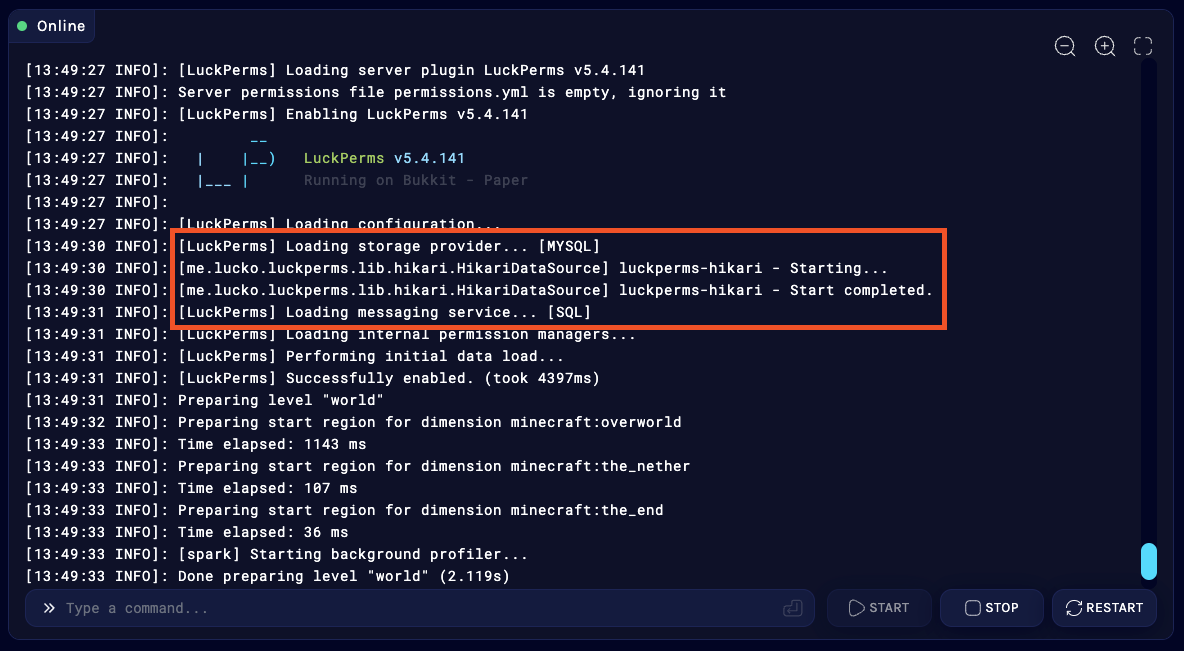
Remember, you'll need to complete these steps for all servers you have in your network.
FAQ 🔗
Where do I install LuckPerms? 🔗
- If you run a network of servers, you should install LuckPerms into the plugin folder of every server you want to use LuckPerms on.
- If you also want to use LuckPerms to apply permissions on your Velocity/BungeeCord proxy, you should place LuckPerms-Velocity.jar or LuckPerms-Bungee.jar into your Velocity/BungeeCord plugins folder too.
- If you choose to only install LuckPerms on your proxy, it will have no impact on any permission checks performed by plugins on any backend servers. If you want that functionality, you need to install LuckPerms on those servers too.
Can I just install LuckPerms on my proxy? 🔗
- The permissions system used on Velocity/BungeeCord is completely separate from the systems used on the backend server.
- You can just install it on the proxy, but any permission checks which are performed by backend Bukkit/Sponge plugins or Fabric/Forge mods will not be handled by LuckPerms.
Requirements 🔗
LuckPerms has a few requirements. The vast majority of servers will meet these requirements already.
- You need Java 11 or higher
- Your server needs access to the internet the first time you load LuckPerms
Java 11 🔗
Your server must be running Java 11 or higher. LuckPerms does not work on older versions of Java.
Some platforms / Minecraft releases necessitate even new versions of Java (e.g. Java 21) which LuckPerms also supports.
Internet Connection 🔗
LuckPerms uses a number of external libraries, some of which are downloaded automatically at runtime.
If your server does not have an internet connection, you can install LP locally (where you do have an internet connection), and then copy the content of the /LuckPerms/libs/ directory to your other server.
Compatibility 🔗
Some known compatibility issues are outlined below. In all cases, these issues are out of our control - and there's nothing we can do to resolve them in LuckPerms itself. 🙁
Some of the compatibility issues are resolved in newer releases of the server - but the fixes are not backdated.
Other permission plugins 🔗
For LuckPerms to fully work & handle all permission checks, it must be the only permission plugin installed on your server (unless you want to perform automatic migration)!
We notice that people often to forget to remove the following permission plugins when they install LuckPerms:
- PowerRanks
- PermissionsEx
- UltraPermissions
CraftBukkit and Offline Mode 🔗
If your server is running CraftBukkit and configured in offline (cracked) mode, LuckPerms (and a number of other plugins, for that matter) will not work. This is due to a CraftBukkit bug regarding the AsyncPlayerPreLoginEvent.
This issue is yet to be resolved. (as of writing on 11th Jan 18) There is nothing we can do about it.
Your options are:
- Use Spigot or Paper instead of plain CraftBukkit
- Enable online mode
Older Minecraft versions 🔗
The main release of LuckPerms is not compatible with Minecraft: Java Edition versions earlier than 1.8.8.
A Bukkit LuckPerms release for 1.7.10 can be found on our downloads page.
Cauldron, Thermos, etc 🔗
If you're using Cauldron, Thermos or any other Bukkit-Forge hack, you may encounter errors when trying to load LuckPerms. This is not a LuckPerms issue - but rather due to a bug in the server.
These issues have been reported to the respective projects, however none are currently being maintained, so this issue will (most likely) never be fixed. In the meantime, you can hack around these problems using the steps outlined below.
(We offer absolutely no support for these fixes.)
- Navigate to the
libraries/net/md-5/SpecialSource/1.7-SNAPSHOTdirectory - Delete the
SpecialSource-1.7-SNAPSHOT.jarfile - Download SpecialSource v1.7.4 from
https://repo1.maven.org/maven2/net/md-5/SpecialSource/1.7.4/SpecialSource-1.7.4.jar - Copy the jar file to the
libraries/net/md-5/SpecialSource/1.7-SNAPSHOTdirectory - Rename the jar file you just copied to
SpecialSource-1.7-SNAPSHOT.jar - Start up server. If it stops immediately, you have renamed the SpecialSource wrong.
Essentials 🔗
If you're using the "Essentials" bukkit plugin on your server, you may have to perform some extra steps to get it to play nicely with LuckPerms.
If you want Essentials to read prefix, suffix & group data from LuckPerms... 🔗
You will need to update to EssentialsX - an updated version of the original Essentials plugin. The original maintainer of Essentials stopped working on the project in 2014 & recommends EssentialsX as a replacement.
EssentialsX can be found here.
If you want to use LuckPerms prefix/suffix data within Essentials, you also need to install Vault.
If you don't want Essentials to read prefix, suffix & group data from LuckPerms, but still want LuckPerms to handle permission checks from Essentials... 🔗
You either need to update to EssentialsX (as detailed above) or...
Delete the player-commands section of the Essentials config.
When Essentials cannot detect a "known" permission system (it doesn't recognise LuckPerms!) - it falls back to it's own config based permission system for Essentials commands.